Progress on the Tree Bee

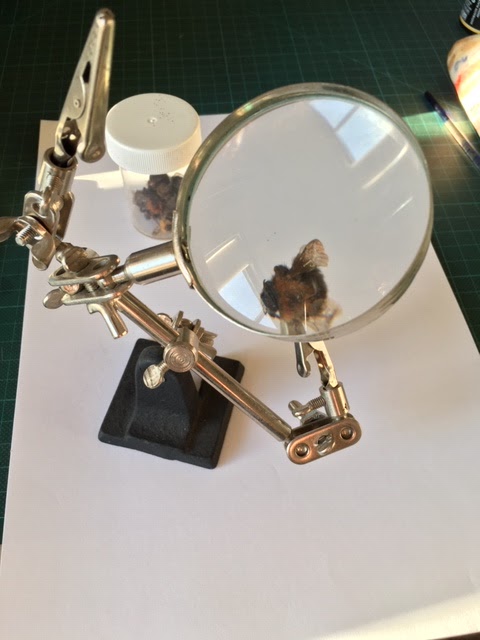
The bee is coming along. I decided to break out a bit and paint this one slightly larger than the Buzz set. It’s been a couple of years since I painted a bee but, as I still have a habit of collecting dead bees I found I had 6 very good little Tree Bumblebees in a pot. It is very helpful to have a specimen to work with.

The tree bumblebee is by nature quite feisty and will sting when it thinks its nest is under threat. I first saw one of these very attractive ginger black and white bees at Easton Walled Gardens back in 2011. It was foraging amongst the glorious blossom of a cherry tree. A few years later,again at Easton, they had made a nest in one of the lovely old stone walls which surround the Gardens. Most recently, apart from seeing them every year in my garden, a colony has set up home in a tree stump in the Spinney. Unfortunately the stump was also the home to a geocache box, so whoever wanted to record their presence would have to contend with some rather angry bumblebees. They have a reputation for taking over old birdboxes and are definitely a bee that likes to site its home up and off the ground.


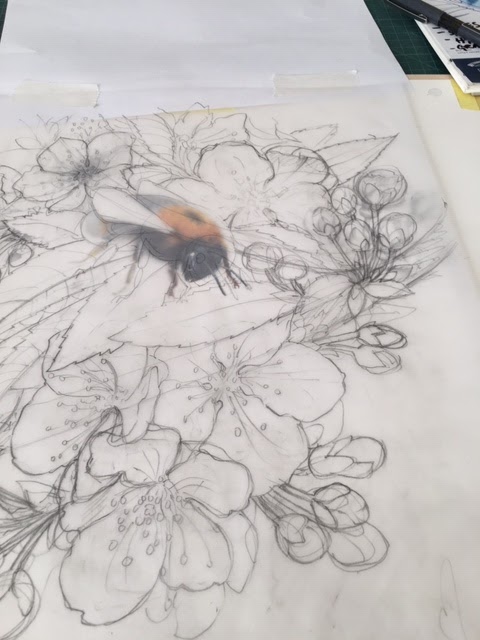
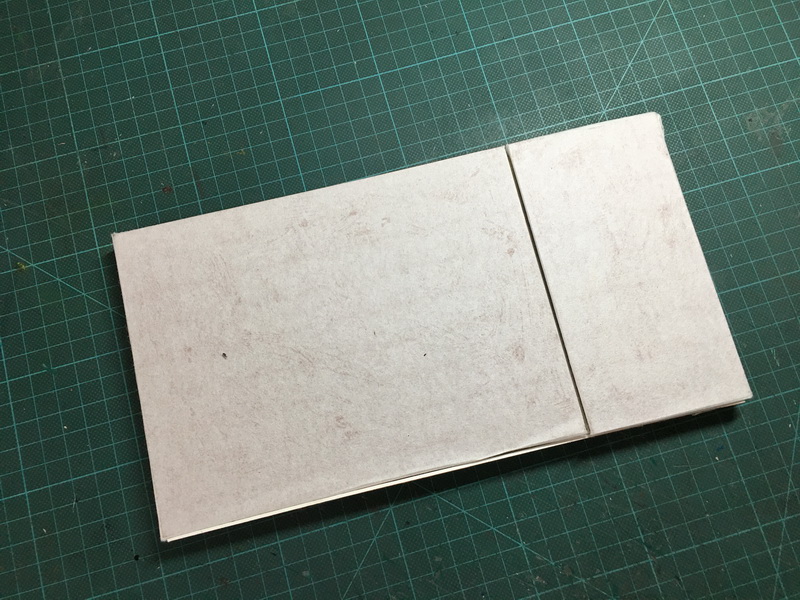
The rough tracing of the cherry, which I changed in the end to simplify the pencil work.


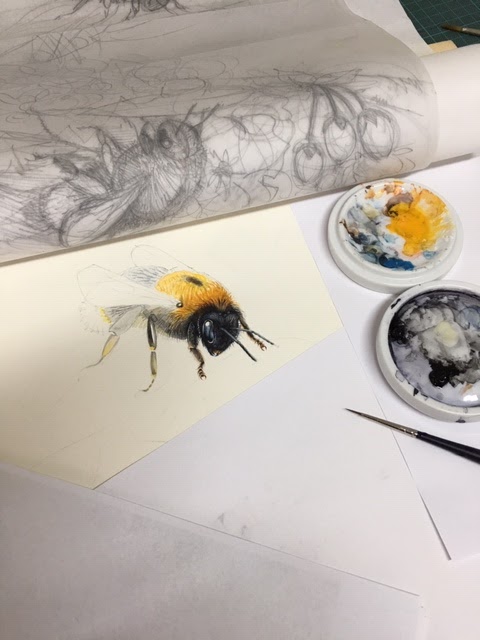
About 3/4 finished… and on the right preparing to paint the wings… always a bit tricky!


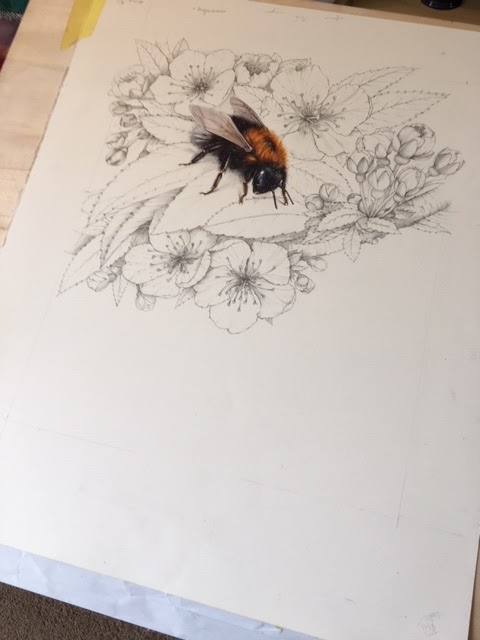
Am I pleased so far???  Hmmm, normally I have to put things away for a year at least to be able to answer that. 🙂

Winter Colours

Yesterday I had another look at the greens outside and made these 4 colour studies.

winter-green-1bg

4 Winter Greens

These were Ok but I needed more scope because the colours are more complex so I returned to the 9 square format I have used before in making colour trials. These two were done last summer for the Easton show, they represent two poppies.
Easton-wcols-bg

I made quite a few small colour mixing trials….

col2-bg    col3     wcol-1bg

These are from looking out of the window at the Garden. About 7 inches square
and more …..

desk-greens-bg

And one larger piece. It’s really a good excuse for some careful observation and colour mixing and can get rather addictive, but they do take along time. With some thought and experiments with different colours you can achieve some very beautiful subtle effects which don’t really show in the photos. It all depends on what paper, which paint, how much water etc.

winter-colours

Watercolour sample about 11 inches square

And a small one in gouache. I am very fond of working in gouache yet seldom do. More to come I think.

gouache-colbg
7 inches square gouache

There are many beautiful colours out there right now. just take a look, unless of course, you have a blanket of snow…but even then.. blues greys purples etc etc…

Beginning a Puppet.Some Initial Thoughts.

The end of June is the deadline for Clive Hicks Jenkins’ and Peter Slight’s Online Puppet Challenge.
I really wanted to contribute to this so have been mulling it over for a while now. How? Why? What? The theme was “Myths and Legends” and I have chosen the legend of the Henham Dragon ( see my original post here)

I don’t have much time but enough to get some ideas down on paper, even if few of them actually get made and  just researching another art form is a delight. 2D or 3D? Because I am really a 2D artist I am starting with a simple articulated paper puppet.

Clive makes beautiful articulated maquettes which he uses for his own work. These forms can be arranged in different positions and so acquire a curiously appealing life of their own. They are not quite the same as shadow puppets but have the same feel about them.
Shadow puppets from Turkey, India and China are sometimes painted on treated hide which makes the skins transparent, allowing the colours to glow when lit.   See an article on the Karagoz puppet tradition in Turkey here.


karagoz5340

Image by Tom Brosnahan who wrote the article. His website “Turkey Travel Planner” is one I will be returning to as we plan to get to Turkey next year.
I am not sure yet what exactly I will do but this is one of the forms I will be exploring.


Pinocchio
The whole subject of puppets is fascinating and if I were to consider 3D I could look at the traditional marionette. I have never made one,  but have  using puppets as inspiration in my work a few times. I also made sample drawings for a version of Pinocchio many years ago.

on-bench-bg

Rough for Geppetto’s  workshop. pencil drawing.

pinnochio-bg

Pinocchio and Jiminy. Watercolour

For my research I had visited The Little Angel Theatre in Islington and taken a few photos. Yesterday on a rainy Bank Holiday Monday I found them again. It was all long before computers and digital photography and most interesting is the photo of the “inspiration” wall, a collection of magazine clippings, cards and real photos.

LA2-bg     LA1-bg


LA3-bg

Photos from the Little Angel Theatre..more years ago than I care to remember. 

It’s all so inspiring…. I am now wondering about a 3D Dragon.

Some Coot, Coots or maybe Cootses

The Coot, Fulica atra, the dark waterbird.

Coming back from holiday always takes a bit readjustment and I am well behind in my various projects. I didn’t get any sketching done in Amsterdam so output was low but input very high.
The Museums, bars, canals markets, food and people were so much fun and so interesting, even in the rain, that we are going back in the autumn.
However it was my turn over on Beautiful Beasts last week and after seeing a feisty coot on one of the canals I decided to do some coot sketches.  You can read more about these sketches on Beautiful Beasts: see Canal Coot and A Cute…ah no….a Coot Chick.

Near the Rijksmuseum, sections of the canal have been planted with nesting platforms of water plants, just a few feet from the bank. This small coot was very busy chasing anything and everything, including us, away from her nest which contained at least one not-very-pretty little chick.

canal coot

Her ugly baby

But I am very fond of coot and see them all the time round the reservoir. I had made this sketch of one of our local birds last year.

acootbg_thumb2

It’s also also given  me the opportunity to finish a trial scraperboard of a coot chick which I had started some years ago.

coot-ph-bg

Scraperboard on the desk..

coot-chick--bg

Scraperboard 4 x 5 inches

In reality the very small chicks are odd looking, with their red/orange bald head and a halo of yellow feathers. They lose these quite quickly. The characteristic white shield of the adult bird, which gives rise to the old saying “as bald as a coot” takes about a year to develop.

coot-baby-sketch-bg      coot-wcol-bgv

Coot are comical and very attractive. I am fascinated by their feet. I am planning a print.:)

Conker Seedlings

When I joined Lucy’s Tree Following Project in February I rather wished I had known in advance because I would have planted some conkers. In a hopeful moment I went to look under the tree by the roadside and found some unprepossessing blackened conkers in the undergrowth, brought them home and stuck them in a pot. Out came sprouts and now they have grown into good little seedlings.

3-seedlings

I though it would be interesting to draw the development so put another one in some vermiculite. That too sprouted, but so quickly that I missed the early stages of growth.

chestnut-seedling

Today, outside in the sun and showers I sketched it. Two small compound leaves rise up from a split in the snaky root which has developed rootlets. Then a shower caught the ink.

showery-sketch

Chestnut seedlings sketches and old conkers: A4 pen, ink and rain.

A small  watercolour sketch stayed dry. Shame…a shower might just have improved it.

shootbg

The optimistic new Horse Chestnut Tree

I am almost packed. We are off to Amsterdam…Hurrah….

Horse Chestnut Tree…slow Tree Following…

The Horse Chestnuts in the village have galloped ahead of me and are in full bloom, their fabulous scented candelabra flowers weighing down the trailing branches. I might get round to drawing a full flower head one day, but they are fiendishly complicated so probably not.

HCflower-bg

One flower spike seems to have an average of about 25 individual flower stalks radiating out from the main stem. Each flower stalk may have from 2 to 9 or 10 individual  flowers. That would give roughly 150 flowers but they are not all in bloom at the same time.

fl

Flower stalks at the base of the flower spike develop first and flowers at the base of those flower stalks are the first to open. They have a yellowy centre initially which then turns crimson. The 5 petals are wavy edged and so very delicate, with long stamens curving down and up from the centre of the flower.
The flower spikes are also very fragile. I have one disintegrating on the desk, the delicate petals fall as soon as you touch them. It is one of those projects where you might draw three individual flower stems a year…then wait for the next season to come around and so on.

It might take many years to complete…….yawn. I do know of some patient and very skilled painters who would happily do that. Not me.

desk-bg

So far I have more or less just looked in hesitant wonder at these complex things. But I have made a page of sketches and a couple of loose watercolours.

horse-chestnut-sketches-bg

A4 sketches … the spike is drawn life size.

The sketches help to work out the construction of its complex shape. One tree in particular is very much more advanced than the others and on the the lowest flower stem a little conker is forming. April seems so early. I brought just that one stem back to draw. This loose treatment seemed a good way of trying to portray the fragility of the flowers.

chestnut-2

Flower spike with first small conker, watercolour sketch

And one flower head.

fl6

Each flower has 5 frilled petals The pollen on the stamens is ginger Tomorrow I am Easton Walled Gardens with my painting group and I know their Horse Chestnuts will be magnificent!
More conkery things to come.

Over at Beautiful Beasts I am continuing documenting progress of The Black Bee and the Pied Shieldbugs.

It will be finished this week.

The Black Bee continued.

It is lovely to see so many bees out and about now and I have returned to the painting of my East Midlands region Black Bee, Bombus ruderatus.
I have rethought the sketch a bit to now include 2 little Pied Shieldbugs (Tritomegas bicolor) which I had photographed inadvertently when I was trying to get a shot of the bees on the white dead nettle at Holme Fen.
They are lovely, very design-y black and white. It’s a bit of a theme for this painting. Black Bee, White Dead Nettle, Black and White bugs.

pied-shieldbug-bg

A blurry little Pied Shieldbug from Holme Fen.

bbsketch-bg

Two Shieldbugs, one at the bottom and one peeping over a leaf at the top.

bee 1 bg

Stage 1:  Eyes first. If these are not right I start again.Then a little colour all round.

on-the-board-bg

Stage 2:  More darker colour all round and getting the head and legs right.

bee-head-bg

A detail of the head at Stage 2. Its about 1/2 “wide.

I am always concerned to get the “pile” right. Different bees have different sort of hair. This bee is a little more tidy than its relation, Bombus hortorum but has longer hair than some others.  They are big bees, not called the Large Garden Bee for nothing.

new-bee-bg

This is almost done but I will make a few changes when I have the background sorted out a bit more. They say “an artwork is never finished, only abandoned”.. how true. You get to a stage when you don’t really want to see it again… at least not for a while. I have not quite got as far as that with this bee. It will be finished next week I hope.

bbsketch-w-b

The background, bugs and bee roughly put together.

More soon.

Tree Following: Chestnut Bud Development.

Despite a bitterly cold day today, spring is racing ahead and it’s hard to keep up. Some of the Horse Chestnut trees in the village are getting leafy. Now I am looking more at trees in general it is interesting to note how early this tree has come into leaf. It must be one of the earliest. The newly opening buds are really beautiful. As the feathery, deeply ridged new leaves open up they reveal a tiny new flower spike, each floret tightly curled.

On the drawing board

This bud is only just opening and the protective scales and the outside surfaces of the leaves are still hairy

just-opening-bg

Watercolour and pencil 6 x 8” approx

This one has opened up quite a bit more. The small leaflets are breaking free.

horsecn

This one has opened further: pencil and watercolour approx 6 x 8” approx

This twig below has no flower buds, they are only developing into leaves. It’s hard to believe these tiny delicate furled things will develop into the huge shady parasols of the mature trees. For me it’s always that bucolic scene of dozing cattle, swishing tails and chewing cud, sheltering from the sun under its generous spreading boughs. Such a beautiful parkland tree.

horse-chestnut-twig-bg

Pencil and watercolour sketch 8 x10

Lucy, who is organising the tree following posed the question. “Is it possible to tell before the buds open up which will have flowers and which won’t.” I have never really thought about it so had another look at the tree today.

What I noticed is that the buds low down or near the trunk are not opening to flower spikes, just leaves. Buds at the end of the outside branches all seem to have flower spikes. Which makes quite a bit of sense. Flowers need to be up and out there, where the pollinators can find them.

chestnut-26th-bg T

he big candelabra flowers spikes will be a challenge to draw!

Horse Chestnut Tree…Some Progress

The Height of a Tree On Saturday I co-opted Chris to help me try to calculate the height of the Church Field Horse Chestnut Tree. There are various ways, I had not realised so many. A handy guide from WikiHow gives some instructions. “Measure a Tree” I opted for a very simple one of asking a friend to stand by the tree.

tree-and-c-bg

So here is Chris standing next to the tree. With a bit of rough calculation we think the tree is about 58 ft high. It is also interesting to see a 6 ft figure by the tree. The human figure really gives an idea of the scale of these magnificent trees.

Two More Sticky Bud Developments

I’m trying to catch the bud development of the Horse Chestnut twig. I have two buds beginning to split, which I drew today. As the sticky scales develop, and open up,  the first four leaves begin to show at the very tip. They are furry, covered in white fine downy hair and tightly curled up. It’s a fascinating contrast of smooth, sticky, shiny scales with the downy hairs of the emerging leaves .

twig-3


Chestnut-twig--s-bg

Watercolour and pencil sketch: 8 x 5 inches

bud-1-bg

Watercolour and pencil sketch: 9 x4 inches

I am keeping all the Tree Following posts together on another blog: www.followingtrees.blogspot.com  It’s going to be nice to see the continuity through the year.

Also it’s easier for the other tree followers to find. If you are taking part, this is the week to sign in with Lucy. There is an update box once a month on the 7th which will stay open for a week.
There are lots of people, not just from the UK, taking part. It will be fascinating.