Leaf of the Day: Water Plantain, Day 5 , The Start

I did eventually get started on the finished piece today. It’s that first agonising brushstroke, that awful point of no return, and not really knowing quite where to start. Yesterday I read by chance of an artist who has to tear up and destroy a full sheet of pure white unused expensive watercolour paper before she starts to paint, just to get rid of the fear. Apparently ordinary paper won’t do! I really sympathise with that. With other less formal watercolour techniques you can get rid of the white paper quickly. Here you are trying to preserve it at all costs.
I tried a few different colour combinations first, (and did the washing up, hung the washing out,tidied my desk and made a cup of tea and even cleaned a shelf in the fridge…) In an attempt to be the purist and mix my own green, rather than use premixed greens, I have ended up with transparent yellow, indanthrene blue and light red but I can feel the need for some sap green coming on….

The early stages of the painting looked fresh and loose but the problems for me occur when I am trying to build up the detail. By layer 3 the freshness had gone and it gets to that middle stage, where it now is, of neither being loose nor detailed and looks like nothing.

I go back to the step by step book for reassurance and there is none (of course). I am beginning to think there is not one good step by step book in the whole world. They are wildly vague..
i.e. …”When the painting is still wet, add the darker green” …
Ok.. How wet is wet? Is it sloshing-about-the-paper wet? Is it still-shiny-in-the-light wet? Is it just-matt wet? Is it only damp-to-the-touch wet or is it really, nearly dry???
And just how dark is the dark green? How much pigment? How much water?
Just in that one casual sentence lie 500 possible traps and opportunities for your work to go horribly wrong.
And why are they always perfect? Can’t we have a proper step by step book where the mistakes are shown to encourage the pupil. It is, after all, the way most of us learn?
If I survive this course I have decided I will write “The Naked Truth Guide to Watercolor ” a step by step book, with warts and all.

While one layer of paint is drying I go back to another book, just for some inspiration and read about the problems that even very experienced artists have had. It is comforting, as I watch the leaves and flowers wither in front of me, to read Shirley Sherwood’s account of trying to commission botanical paintings of her favourite plants.
Streptocarpus did not enjoy being moved out of my orangery to be painted by Jo Hague and shed their flowers. The spathe of Monstera Deliciosa fell off in transit before Coral Guest could work on it and she had to wait weeks for another one to develop. Pandora Sellars had to paint her magnificent Blue Water Lily over two years as she could only complete the flowers during the first year and had to finish the leaves during the next season. “


Here it is, in Shirley Sherwood’s book “Treasures of Botanical Art”. No step by steps, just beautiful inspirational paintings.

_____________________________________________

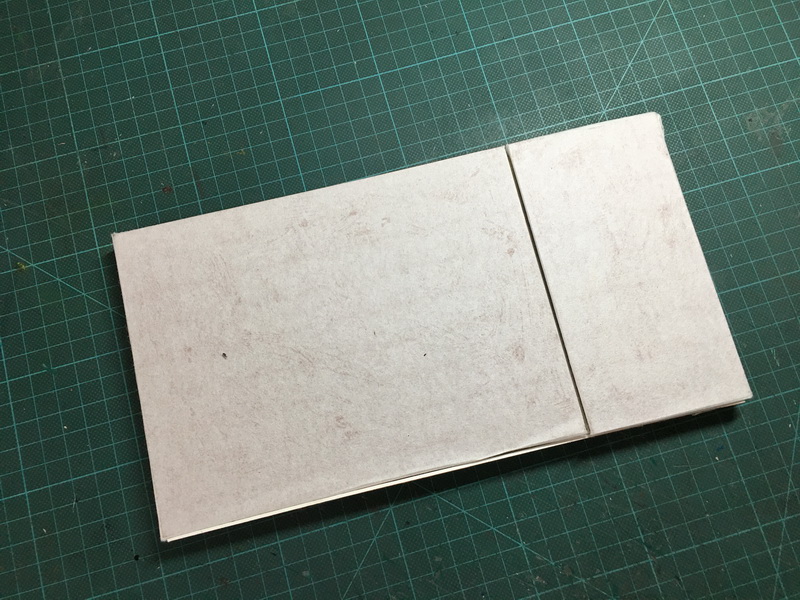
Water plantain. Stage 1

Leaf of the Day: Water Plantain, Day 4 and the Paper Problem

At the weekends Chris and I go cycling for a couple of hours. Yesterday and today’s trips have been interrupted by my screeching to a halt after possible accessible plantain sighting. All to no avail as even with my long legged and long armed helper they are still too far out of reach. I have one small flower stem which is still clinging onto life and it will be fine for now. The leaves have been in the fridge and are faring better and I have been wondering how I am going to tackle the leaves.

The next conundrum I have is which paper to use. The possibilities are many and the personal choices of various artists differ wildly, so you really have to try different types for yourself. The surface is important and most tutors seem to recommend a very smooth hot pressed (HP) surface. I had not used hot pressed paper before starting this course as any detailed work I had done before was working with acrylics in a very different style. For economy’s sake (this stuff is expensive) I narrowed it down to either Fabriano or Arches.

Arches “Not” used to be my number one favourite for loose watercolour. It held an expressive brushstroke edge, the colours were bright, did not sink and merged beautifully. That was a different technique of course, where I would seldom work back into the image in any great detail. Yes it did used to smell a bit gummy, but it was hard and crisp and lovely. I feel recently it has changed and doesn’t seem so responsive in the way I liked.
This very old sketch of a jug and pomegranates from Lanjeron in Andalucia does perhaps show the texture of the “not” surface and how the paint has settled here and there but kept those nice edges.


Many years ago I would would be working for illustration on a beautiful illustration board or, in pen and ink on the wonderful Schoellershammer 4R paper neither are available now.

But for some help and advice today I have gone back to read one of the books about the techniques used for botanical painting. Many artists use “lifting out” where, with either a wet or dry brush, you lift some paint to (hopefully) expose the paler paper underneath. It’s a useful and classic watercolour technique, not so easy as it looks in the book…what ever is ???? but might be useful for the leaves. I did a little lifting out in the previous submissions but was not very happy with it.

So I decided to test the papers I have here, specifically for lifting out. Firstly lifting wet paint out with a drier brush then lifting out with a wet brush.
I have two weights of paper, and 2 different surfaces ..
“HP” is hot pressed. ie, very smooth,
“Not” is literally “not” hot pressed, which is slightly rougher.

I try both the “right” side, the watermarked side and “wrong” sides in each case.

The first ones are Fabriano;
Fabriano classico HP 300lb
Fabraino Classico HP 140lb

The second ones are all Arches ;
Arches 140lb HP, not good at all and has an odd “laid” texture.
Arches 300 lb HP, great texture and paint settles in little dips despite it being HP. Lifts out better than 140 HP
Arches Not 140 lb, nice but not much more textured than the 300 HP, lifted out OK.

My sketchbook is a Kilimanjaro note book. I have come to like the paper and did I buy some 140lb Not surface to try, so have added this to my test.
I think it may not be robust enough for much lifting and reworking but has been very nice for some of my earlier informal colour sketches. It did lift out quite well and I used it for the leaf study below.

My overall thinking is that the best paper for lifting out, either dry or wet is the Fabriano but using the wrong side. I am surprised that the side made much difference but in both the Arches and Fabriano I had noticed a very slight grid pattern on the watermarked side which I really dislike…you have to almost get a magnifying glass to see it but I know it’s there now.
There is nothing scientifically accurate about my tests, and 10 different artists will give you ten different opinions, it’s just what works for me.

So in conclusion, I should probably be working on the wrong side of the Fabriano.. problem? Yes ..I have drawn it out on the right side.. ah well..next time.

I did get a slightly better leaf study done which was necessary as these leaves have a complicated vein structure, with a pronounced main central vein, 3 or 4 parallel veins which are pronounced on the back but harder to see on the surface of the leaf, and then many tiny secondary veins which radiate out from the main central vein and seem to cross the parallels…phew…
______________________________________________

Plantain Leaf Sketch

Leaf of the Day: Water Plantain, Draw, Re-draw,and Chinese Whispers

It’s Saturday and so there are other things to be done than paint the plantain but because time is short I am trying to devote 3 hours today and 3 hours tomorrow to it.
Warning! If you are not interested in the painful, laborious steps of my first proper botanical painting, come back on Thursday. It should be all over by then and I will be back to drawing my Soapberry tree and the myriad of exciting pods, seeds and bits and pieces waiting for me at the garden. If however, you are drawn to slow motion road crashes and the possibility of witnessing a pig’s ear in the making, stay with me.

I am at the stage where I have one drawing of the leaves and one drawing of the flower stem, some previous studies and composition sketches and … horror of horrors… the stretched, pristine, white and beautiful piece of paper to work on.
This is the first piece of work that I have spent so long on for many years. For a piece of botanical art things have to be carefully planned as there is little chance for alteration. I do hear of very experienced painters who seem to get started with the bare minimum of preparatory work but as this is my first, I am learning as I go.

Here are my hesitant steps.
Trace…
I have to get the drawing onto the final sheet now, so learning from Sandrine Maughy on the course I attended in May, I will trace the drawings and transfer them onto the paper. Why not just draw the design on the paper in the first place? Well, it’s a complicated subject and I need to rub out and correct all the time so I would have damaged the paper surface too much..much too much!! Also if you have them on two separate pieces of tracing paper, it helps to place the leaves and the flowers exactly where you want them. So I trace them. Here are the two drawings overlaid.

Transfer…
Having spent a long time thinking about just the right position for the leaves and stem I transfer the drawing using tracedown paper. Only the main outlines this time.

Re draw…
I now have faint thickish lines which I will have to correct and some of the very detailed parts, like the tip of the flowers spike, I will have to redraw in more detail.
So, this is the fourth time I will have drawn this flower spike. Am I bored? Very…also the tedious repetitious nature of this task means that things change a bit every time you re draw, the artist’s version of Chinese Whispers. I had written before about the unreliability of the old herbals which had been copied from earlier ones so many times that the plants became unrecognisable. There is definitely a danger of that here so when I come to paint I will have to check all the time with the plant and my previous drawings that I am getting it correct.

Masking out…
The next thing I want to get done today is masking out the white flowers which will sit in front of the green leaves. The white of the flower has to be the white paper and it will, I think, be easier to paint the leaves without worrying too much about the stem. I am not at all sure that I am doing the right thing, but I get the unspeakably smelly rubbery masking fluid out and blob it on my beautiful white paper as accurately as I can. It is latex and painting with rubber is not easy.
I have to say that the course is no help at all in ‘teaching’ you anything. You just have to muddle through on your own and read the books (which you have to buy), or try to find an (another) expensive course to attend. I personally find it very hard to learn from step by step books and because I have been a jack-of-all-trades commercial artist I have acquired some very bad undisciplined, slapdash painting habits, unacceptable in the botanical painting sphere.
But this is what I signed up to to do, to go back to basic careful observed drawing..and discipline!!…so I should just get on with it.
Here is my drawing board with the masked out flower heads.You can see the tracings and the grey transfer paper and, I have just noticed, in the background is my well deserved end-of-the-day glass of wine (bad old painting habit).. but the sun is well and truly over the yardarm now, it’s 8.00 pm and it is Saturday.

Colour Studies…
One last thing today, a couple of colour studies. Before I start the coloured version I need to test my colours and think about the colour balance and tonal values. Again, an experienced botanical painter will just know instinctively what colours to use. I don’t. And after the comment about my colours on the last piece I am even more unsure. Am I trying to match the colours accurately or be aesthetically restrained?.. a bit of both I guess. I did ask but had no reply.
The first sketch was a time saving, colouring-in of the combined tracings just to see what it might look like in colour.

…..11th hour changes.
All day I have been niggling about the crossed stems of the leaves. Now I know I don’t like them. They are just too cutesy and I have been influneced by too much looking at other people’s “designed” botanical painitngs where the plants are placed with design in mind rather than growth habit . Although they do grow like this I prefer them to be more static. There is enough wavy stuff going on with the flower stem. It means changing the design on the prisitne white sheet a bit but never mind, this is after all a learning process, she says defensively.
I was about to make a better colour sketch but that will have to wait till tomorrow. Instead a quick w/colour to try out this change. I think it’s much better and I can see where the problem areas are going to be.
________________________________________

Plantain Colour Sketch

Leaf of the Day: The Water Plantain, Day 2

There was no avoiding the plantain today so I went out to look for more specimens. Due to heavy rain (add spectacular lightning too) over the last two days, the wretched things are retreating even further off shore but I did get some leaves and one small flower spike which, combined with my earlier sketches, means I can make a start. I also rethought the layout in view of the shape of these new leaves.
I can now give this a real name, thanks to Phillip who runs the Florida chapter of the American Society of Botanical Artists. Link here
He has not only cleared up this mystery, but also provided me with a nice chunk of text for this post…thank you Phillip!

“I did some slight research for you on yesterday’s plant and think that what you are drawing/painting is indeed a Sagittaria species – Sagittaria lancifolia, the “Bulltongue Arrowhead”. At least based on what I can see from your pictures.
Also according to my resources – Alisma species in Florida anyway are now in Echinodorus. Echinodorus seems to have perfect flowers while Sagittaria has male and female flowers separate (on the same stem)females first and then males above. The females have the large round pistil that is so noticeable. Both are in the Alismataceae and otherwise very similar.

He goes on to recommend “A Guide to Florida Wildflowers, by Walter Kingsley Taylor.
and knowing my interest in any odd facts,
“You’ll be interested to know that Taylor’s Florida Wildflowers shows Sagittaria lancifolia as its second entry with the notation that, ‘Seminole Indians used this plant for shock treatment from an alligator bite.’ !! Unless it produces complete numbness I can’t imagine its efficacy!”

Me neither. I was thinking though that I could do with a well trained alligator right now to do “fetch and retrieve” for these off-shore plants. The resident flock of ibis are no help at all and can be bought with neither kind words nor a loaded gun.

Thank you too, to Paul for the “Duck Potato” name which seems to be applied to various species and takes its picturesque name from the “edible” tubers..although ducks don’t often seem to eat them. They were once an important food source for the local Indian peoples.
These tubers can be eaten raw or cooked for 15 to 20 minutes. The taste is similar to potatoes and chestnuts, and they can be prepared in the same fashions: roasting, frying, boiling, and so on. They can also be sliced and dried to prepare a flour.
Other edible parts include late summer
buds and fruits.
Another plant for my “garden edibles” list.

I made a drawing of the leaves to the right size and a first rough draft of the flower spike followed by another more detailed one. This is such slow work !! These will form the basis of the finished work. It’s a more complicated task because no one stem is nice enough to work from excusively, so I am having to make an amalgam of several bits and pieces, taking care not to create a completely new monster species. Sagittaria pato v. valerii. The bad person in me would like to put this name on the final piece for submission…
______________________________________

Water Plantain Sketches

Leaf of the Day: One Bite at a Time…the Plantain; Day 1.

I am wondering if I should carry on with this SBA course as the deadline dates for submissions loom like the beginning of a prison sentence. I try to remember such motivational sayings as, “per ardua as astra and “if a job is worth doing, it’s worth doing well”.. and my particular favourite when confronted with that over facing task, “the way to eat an elephant is one bite at a time”
I would much prefer to spend the day researching proverbs than start this task but as self discipline is the only hope for a procrastinator I must just get on with it.

I realise now that I could have found something much simpler for this piece and may still change my mind. Again it is the problem of wilt. The flowers die as soon as you look at them so I will have to get the basic stem position drawn in and make some good drawings of the flower and seeds pod structures to refer back to when my current model has withered away. I am determined not to fall back on photographs. It is the slippery slope. Also I am honestly finding that the only way to really understand the flower, for a botanically inclined painting, is to have it right there in front of you, so you can pull it apart and turn it round and look from every angle.


My inspiring stems!….

One good thing is that the stems I found the other day, even if they are tatty, seem to be surviving in a jar water and have a new flower every day, but I will certainly have to go and get another before this is finished.
The real botanical illustrators sometimes take a couple of years to finish a painting, religiously waiting for the next flowering or fruiting season to paint the new stages of a plant’s development. Our tutor on the short course I attended in the UK, Sandrine Maughy, had started a painting of lilac blossom (terribly complicated) but had been unble to complete it this year so will put it away and return to it next year.
I find that hard to envisage. When I do eventually start I am hoping this painting will be done in 4 days.

So today’s bite size chunks of this elephantine task are some more studies. One of the buds was beginning to open so I thought this would be a good simple starting point but it opened so quickly, that within an hour it had gone from bud to fully open. My studies are as quick as I could do….Phew..
I then went on to a bigger version of the open flower and a more stationary seed head and then a pencil study.
Tomorrow I am going to go and draw outside for the day, for air and for light and look for more plantains.. one must also remember that “all work and no play makes Jack a dull boy” ..no?
____________________________________________

Plantain Studies

Leaf of the Day: Water Plantain ..of some sort..

I have had a frustrating start to the week. I realised that the due date for the next SBA course submission was getting very close so decided to get organised. This time it’s a single plant “portrait” so last night I stretched the paper, cleared the decks and was ready to go and find my model.

I had decided some time ago that I would make a painting of the pretty white water plantain which grows in the water margins everywhere here… everywhere, that is, until you want one. After a whole morning of lake shore trawling and a bit of trespassing I ended up with only a couple of tatty flower specimens which are full of bugs, and some leaves. I was bitten to death by whatever horrible things inhabit the lake shores and got my feet wet feet because, here in Florida, grass is not always what is seems. It is often water masquerading as grass, no doubt there were leeches too. (Visions of the “African Queen”). This is all because since the summer rains, most of these plantains are just out of reach, just a couple feet from the shore…just two inches away from my fingertips… just too far …Sigh.

But to salvage the day I did start thinking about composition and made some rough sketches of the battered flower stem I have and a couple of composition sketches. It’s an important step and one that is tempting to miss out.
I am also having real problems finding out exactly what this is. It’s definitely not the “arrowhead ” which obligingly has an arrow headed leaf, although the flowers are the same. There are 3 or 4 different species which have similar flowers but I am almost sure this is Alisma subcordatum or it could be the Alisma plantago-aquatica the common Water Plantain. The thing that confuses me is that some of the flower spikes seem slightly different.
The scientific name “Alisma” is derived from the Celtic word for “water” and one curious colloquial name “mad dog weed” seems to come from the use of roots as a “cure” for rabies. If I get any madder today I will just chew on a leaf.

However, you can see why I would like to draw it, those simple flowers and graceful curving stem. It’s a dainty plant with its delicate white petals and round green seed heads so eventually it could/might make a nice piece of work. The search for a good specimen continues tomorrow….

_________________________________

Water Plantain Sketches