A Box for Bird Hide and Stickers for Pigs

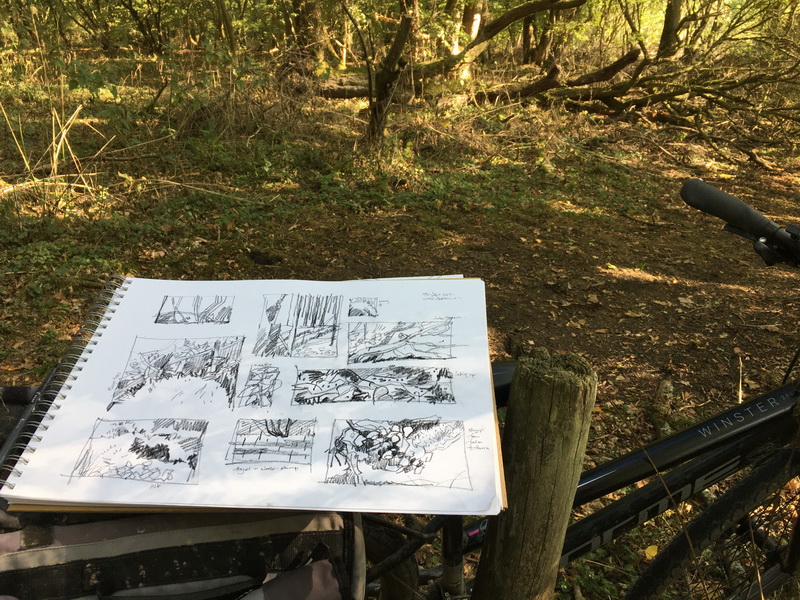
Things have been really busy this spring with the very good bookbinding course at City Lit and general print experiments based around ancient grains and their production and more pig progress. One of the projects I worked on at the bookbinding course was a box to contain the little “Bird Hide” book I made a couple of years ago. See here https://pencilandleaf.blogspot.com/2017/02/bird-hide.html

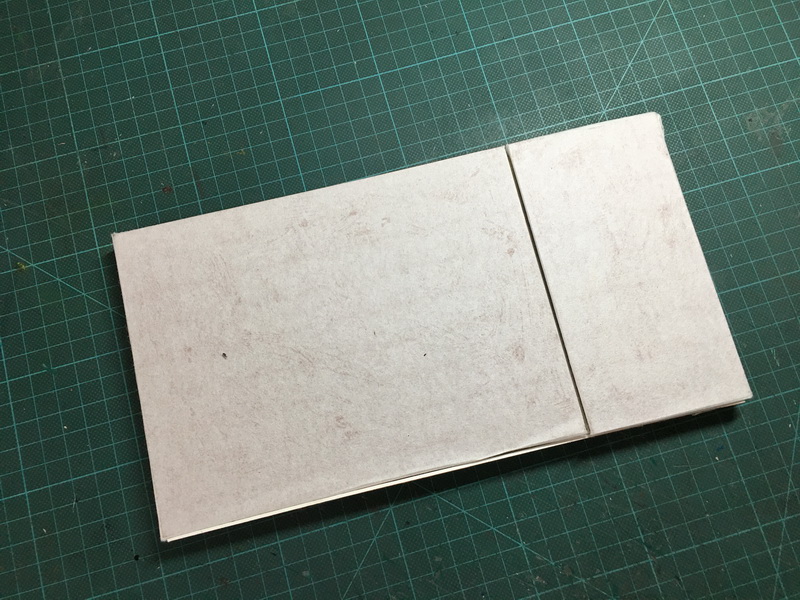
I wanted to try making a box to hold a book, so I printed some calico for the bookcloth and some Japanese  paper for the interior covering material.It’s not exactly difficult, it just relies on very accurate measuring and a methodical approach, building a tray, the box top and the inset, then preparing the base and side and front cover with an extra inset for the inside of the cover and then assembling it all.. and just hoping it fits. It did! Hurahh!

IMG_2534

The structure of the box inside.

IMG_2537

The front cover with the printed bookcloth and the box structure.

IMG_2556

The finished box interior. The book fits into the aperture and under the book is a map of the walk which relates to the concertina book. Opposite is a short piece of text about the book and the path.

IMG_2545

There is an extra element. If you lift the map there is a tiny nest with three eggs. It’s all about birds, hiding, the woods and the path to the bird hide by the lake. I was so pleased that it worked! It has made something special of the small book.

And then pigs.. you can never have too many pigs. We are slowly getting round to the packaging of the Salute the Pig prints and the book. There have to be stickers!

IMG_2732

More soon…..

Almost done: The Problem Woodblock

It was all going so well .. so well. I came back from Amsterdam and with a bit of faffing about with shimming and extra packing, printed 11 of the large Tree woodcuts.

IMG_2286
“Alder” one of my favuorites,  with the charcoal burners and rooks.

Then the last one just would not print.

IMG_2296

There is a low strip in the wood and sod’s law it is on a part of the block which really needs to print a nice even black.
All  day Friday and again on Monday I tried everything;  shims, extra strips on the back under the low spot, raising the grain with steam and sanding down the high spots but still it refuses to print.

By lunch time on Monday I knew this was doomed so the only remedy was to cut another block.  Resigned,  I came home and promptly feel ill with an awful cold and I thought I had come through the winter pretty well! Wednesday, still with my awful cold  but cheered by the arrival of frogs in the pond, I re-cut the block. What a pain. But as with all these setbacks there is something to learn.

The dip in the wood was impossible to discern in its raw state but in future before starting I will run a block and sandpaper over the surface of the wood to flag up any serious flaws. To be fair this is cheap plywood and its done pretty well so far.

IMG_2302

Eventually on Friday, still with the awful cold, I finally managed to print the last block.

IMG_2303
“Willow”… at last.

Printing these blocks on the Western Press has been interesting and quite a challenge. They are big plates so need lots of ink.  I have double inked most of them and re-inked the rollers after every 2 or 3 prints. The tricky thing has been keeping the printing more or less consistent over the series; not too dark and not too light. It’s a balance of inking and pressure.

Some blocks are slightly higher than others and need less packing, some need lots of packing and more re-inking. Each plate must be proofed individually. It’s a slow and painstaking business.

I decided early on that I would let the grain of the blocks show. It gives an added texture to the prints and of course, as they are about trees it is much more appropriate than slapping on a heavy black and obliterating all the fine grain texture.
I am hoping to make 20 books. 10 with these plates printed on the Western and 10 with images I print at home. I am hoping to add another colour to some. But the next step is the binding.

Almost done…part two…

I have almost finished the woodblocks for the tree book. Hurraah.. It has been a long haul and a steep learning curve. Deciding to do this book has perhaps been a rather rash way to learn about woodcuts but I am so far down the road now that it really should be completed.Today has been trimming the text  blocks, neatening edges, sanding and cleaning up the blocks before final proofing tomorrow. Then there is finalising the dummy book, layouts and pagination before hopefully printing next week.

blocks 1    blocks2

Below two rather pleasing piles of blocks, 12 trees and 12 text blocks kept flat under weights.

weights

It is at the stage where I am not fond of anything about it, seeing only errors and compromises.  But that is an inevitable part of the process and what actually spurs me on to do better next time!

The proofing and printing will be more interesting to blog about than a pile of woodchips so more very soon!

Almost done…

It would be very boring to keep posting yet another woodcut in progress but I am pleased to say I’m just a few days away from completing the set of 12 trees and their text panels. Then there will be proofing and the inevitable last adjustments. Then the start of more decisions, title page, endpapers, colophon etc etc. Then hopefully printing in January… then binding.

blocks

Xmas will just come and go as not only have I this book to complete, but also a set of delightful pig linocuts…more of that very soon.

So, a very Happy Christmas to all my readers. There may well be a” Wassail print” to welcome in the New Year. 2018 is looking busy!!

Cutting the Wood. Inevitable Dilemmas.

Cutting these blocks is challenging. In my new printmaking journey there have been only a few woodcuts, so I knew this would be a learning process. However I chose wood to match my subject. It is the most appropriate and sympathetic material for trying to catch the essence of trees and that’s my main aim.

I am using very basic ply wood so cutting it is tricky because, as with all media, it has its own qualities and drawbacks. Unlike wood engraving blocks or quality solid woodblocks, it chips easily, does not take fine details and has a mind of its own, sometimes taking the cut in a different direction to the knife and it snags horribly if the knife is not sharp.
The plus side is that it is easy to physically cut.
The most intimidating aspect though is the “when its gone, its gone” problem. One slip of the knife, one thoughtless cut cannot be easily rectified, so there has to be some planning. But over-planning and following a careful drawing can make for a still, formal image … very good for some subjects but not for my trees! They need life and character.

My tools are very simple. So far I have used 3 main cutters, 2 x V points and a U shaped gouge. I keep a trial cutting block on the desk to try out ideas for cuts.

I spend probably too long looking at the rough drawing, trying  to work out some basic lights and darks and the day slips by. Plans for careful cutting and planning go out of the window and I have to “ just do it”.
Sometimes that works, sometimes it doesn’t. At this stage, about half way through the series I have made the main cuts on 8 of the blocks. The plan then is to proof them and see what I have and how they work as a series. Then I will work on the details to adjust the tones and clean up the blocks. If I have cut away too much I will have to start again…angst levels are high.

roughs-

A pile of rough working drawings.

IMG_1881

And taking the block out again, this time to the field maples.There is nothing like working direct.

A series of anything are interesting to work with and I love the design stage. You need variety but also something to link the images, style, subject etc. This will be a simple  book with minimum text, so each turning page needs to bring some delight, something visually interesting, and intriguing, which makes you look forward to the next turn, each image adding something new to the “treeness” of the book.

Ideally the complete book, the paper, the binding,  the endpapers and the printing, will become a thing greater than the sum of its parts.
As I said, it is all a challenge and I am finding the fear of the pristine wood surface is even greater than that of blank white paper. I never thought I would find something more intimidating than that!

Reference Sketching.

This last week I went out most days to make small sketches of the trees for the book. I find that just a short time sketching is a million times better than working from photos.
Making a sketch, especially on a very cold day, requires you look hard and make fast, hopefully intuitive, decisions. So you tend to record just the essence of tree, very useful for the woodcuts which will have to be bold and simplified.

Also I have to say that once I have sketched something I understand much more about the thing, how it is put together, what interests me about it and I remember all those things more easily, especially if I make notes.
I am in a hurry too because I need to draw the trees before they all lose their leaves. I need to make sure I draw the right tree. My bark ID skills are not brilliant

.IMG_1213    IMG_1051
Hazel and Lime

IMG_1036    IMG_1074
Alder and Elm

IMG_1229
Beech

IMG_1188
Elder
I have a tight deadline so I also took the woodblock out to draw directly from the elder tree. This old, much pruned, tree has snaky spotted branches which twist back on themselves. Wonderful and slightly sinister as befits the magical elder!

The tree prints will be based on trees I know well, what I like about them and what I know about them. A personal view rather than an archetype. I have discovered that one elm can look very different from another :).

Twelve Trees Book at The Logan Press

Over the last few weeks I have been planning a book to showcase just 12 of my favourite trees from the Spinney. I have been working up to making a proper book with letterpress type and the illustrations printed from the original woodblocks.Now it is a little bit closer to becoming a reality.

I am delighted to say that Patrick Roe at Logan Press has agreed that I can print the book with him. I will learn a huge amount, building on the work I did with Thomas Gravemaker at Letterpress Amsterdam who I hope to be seeing again in Feb to print “The Pig Book”.
So lots to do in the next few months.
I will be documenting the progress of Twelve Trees on the blog and also on Instagram etc. It will be a 32 page book with 12 full page woodcuts and a small amount of type based on old sayings, superstitions and the characters of the trees.
The format is a nice generous 350 x 250mm portrait with full bleed images and hand cut titles. Roughs and layouts and first cuts are underway!

roughs-and-plan

Rough layouts for the twelve images and first roughs.

First block, rough and my original sketchbook drawing from last year on the blog here; “ In the Woods,some Useful Sketches.” I just knew they would be useful someday!

Colour Sketches from the Wood

Some small sketches from the wood to make some colour notes as the weather changes. They will help so much for printmaking. I start with a pen sketch just quickly getting down some main lines and lights and darks and then follow up with the colour notes.
I have wanted to do this for some time dithering about what paint etc as I need a quick drying paint for working outside.
In the end I used gouche. Gouache is still my go to paint for these quick colour notes. I love its thick slightly chalky texture.

s01

It’s a small square sketchbook 5.5 inches square 14 x14 cms

S2s3s4s5s11s6s7s8s10s9s12s13S14s15s16

There are 60 pages.. I hope to fill them all.

Back to The Spinney

While working on other projects and having a bit of a holiday in Bilbao ( very nice) I continue to cycle up through the fragment of ancient woodland that is Savages Spinney. Heavy leafy branches now arch over the path which is patterned with the slanting rays of sunshine and dappled shadows.

I hope to be working on some bigger prints next week and so yesterday I decided to do some more sketches from my favourite spot for some reference material to work from.

treeo

There is a particular tree on the path which often catches the light. This little sketch to record the basic shapes and the lights and darks.

IMG_0361
My sketch by a fallen tree in my favourite spot.

Then more, to simplify things and look for shapes and ideas, making a rough record of what I am seeing now, in summer. It is so much busier and complicated,  so different from the stark tree shapes of the winter I had sketched before in November.

tree-2

This one above just line and a few details then the following sketches with more tone, to record the dappled light, the path, butterflies, branches knitted together with lichen, seed pods, spotted leaves, bees and leaf canopies, puddles and the water of the reservoir etc etc.  I made written notes about sounds and wildlife as well as notes of shapes that I might add.
There is nothing like working on site. You can eliminate so much of the muddle and focus just on what you want.

tree-1     tree2     tree3     tree4     tree5     tree6    tree7     tree8      t10

A4 Sketchbook pages, pen and brush and inks.

 sbk
The more abstract the sketches become the more possibilities present themselves and the more they represent to me the essence of what I see in the wood. I hope to get some small paintings done later this week to explore some of these in colour.It will be very interesting to see how these carry forward into prints!

Oak … Book 1

Back in December I made some woodcuts of the Oak trees in the spinney.
This is a collection of the woodcuts, very simply printed and bound into a wordless book.
Yes, there are mistakes but it is a bit of an advance.
The plates are hand printed, the cover is printed from hand cut type and it’s bound by hand. There are two 6 page sections, 10 images printed on Fabriano 300gsm with red endpapers and it is a satisfying 24cm square.
The biggest book I have attempted so far.

oak-closed
“Oak…Book 1”  24 x 24cms

oak-3

oak2

oak-sp
Oak, spread.

proofs
Early proofs.

I am calling it “Book 1” as I am hoping that “Oak ..Book 2”  will have some text and be bound a little better!